
ECAM Data
Economic Consequence Assessment Model (ECAM) data is a computable general equilibrium model used to evaluate the impact of shocks to the economy in terms of reductions in labor and/or capital. LifeSim allows users to access the ECAM model through the internet during simulations. To use ECAM during a LifeSim simulation, an internet connection is required. In the context of LifeSim, the model is used to evaluate the indirect economic damages associated with a flood event.
As stated above, the ECAM model requires estimates of the reductions in labor and capital due to flood events. Since labor reduction calculations take life loss risks into account, ECAM cannot be run unless the life loss compute option is turned on (review Section Create an Alternative). The labor reductions are based on the number of work hours reduced due to people being displaced from their homes due to flooding and life loss. Capital reductions are based on the damages to commercial, industrial, and public structures and their contents. To convert these to ratios, a total supply of available labor and capital must be provided.
Because ECAM runs each county independently, values for labor and capital must be provided for each county in the study area. The total labor and capital must represent the total for the whole county, not the portion of the county in the study area. Available capital is entered as the total value of commercial, industrial and public structures. Labor should be entered as the total under 65 years of age population at all structures at 2AM. For more detail on computing indirect damages with ECAM, please refer to the LifeSim Version 2.0 Technical Reference Manual, Chapter 8.
Import ECAM Data
From the County Data Source panel, select the polygon shapefile from the County Shapefile list that represents
the counties in the study area. Select the polygon shapefile from the dropdown
 list, which
contains all valid shapefiles added as map layers to the project; alternatively, click the
list, which
contains all valid shapefiles added as map layers to the project; alternatively, click the
 button to browse
to and open the appropriate shapefile. Following the county shapefile selection from the 5 Digit FIPS list, select
the appropriate field name (e.g., GEOID) that contains the county’s 5-digit Federal Information Processing
Standard (FIPS) code (“SSCCC”, where SS is a two-digit state code
and CCC is a three-digit county code). The county data table (located at the bottom of the ECAM tab) updates with the
County FIPS and County Name
attributes contained in the selected shapefile. Enter the Total Capital and Total Labor values for each county in the study area.
button to browse
to and open the appropriate shapefile. Following the county shapefile selection from the 5 Digit FIPS list, select
the appropriate field name (e.g., GEOID) that contains the county’s 5-digit Federal Information Processing
Standard (FIPS) code (“SSCCC”, where SS is a two-digit state code
and CCC is a three-digit county code). The county data table (located at the bottom of the ECAM tab) updates with the
County FIPS and County Name
attributes contained in the selected shapefile. Enter the Total Capital and Total Labor values for each county in the study area.
ECAM also requires users to enter the flood duration (hours), the reconstruction period duration (hours), and the cleanup period duration (hours). The flood duration depends on how quickly the flood waters recede. This data can usually be obtained from a hydraulic model. Currently, the user must provide a single value for the entire flooded area, so thought and judgment must be given to the definition of this duration time.
The flooding Duration depends on characteristics of the river and the timing of floodwaters receding. Users can get a general idea of the flood duration for the event from the hydraulic model. The Reconstruction Period is the average number of days required to rebuild a damaged area to pre-flood economic conditions. The Cleanup Period is the average number of days required to remove debris from flooded area. The reconstruction and cleanup period durations depend on the types of structures located in the flooded area.
To import and create an ECAM dataset:
- From the LifeSim main window, from the Study tab, from the Study Tree, right-click on ECAM Data. From the shortcut menu, click Import ECAM Data (Figure). Another way is from the LifeSim main window, from the Study menu, point to ECAM Data, and click Import ECAM Data (Figure).
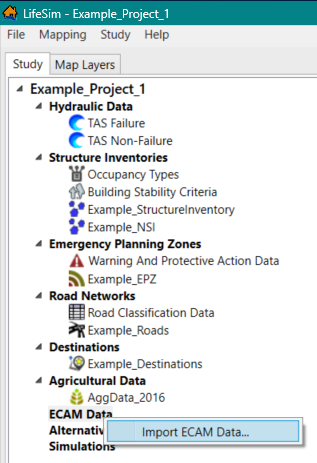
Figure: LifeSim Study Tree – ECAM Data Shortcut Menu 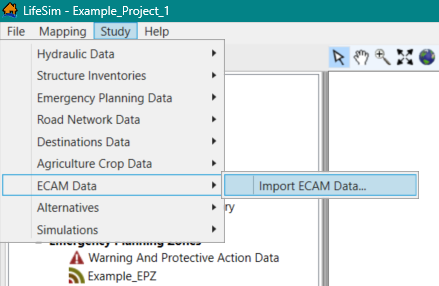
Figure: LifeSim Main Window – Study Menu – ECAM Data Sub-menu - Either way, the ECAM Data Importer dialog box (Figure) opens.

Figure: ECAM Data Importer - In the ECAM Data Name box (Figure), enter a name for the ECAM dataset.
- From the Study Shape Data dropdown list, select the desired imported map layer (e.g., Ex_Destinations in Figure). Alternatively, click the button to open an Open browser window (Figure). Navigate to the directory where the desired shapefile (e.g., *.shp) is located, select the shapefile, and click Open. The Open browser window closes, and the ECAM Data Importer displays the selected shapefile in the Study Shape Data list (Figure).
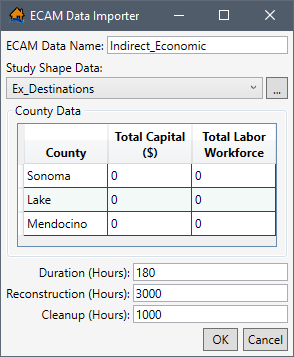
Figure: Example – Completed ECAM Data Importer - The Study Shape Data selection updates the table in the County Data panel with a list of the counties retrieved from the selected Study Shape Data (e.g., Sonoma, etc. retrieved from Ex_Destinations in Figure). The county data is retrieved based on the selected bounding polygon shapefile.
In other words, LifeSim filters the list of counties to only include areas within a boundary polygon created based on the selected study area’s top, bottom, left and right geometric extent. - The ECAM model requires estimates of the reductions in labor and capital due to flood events and runs each county independently. Therefore, for the desired counties in the County Data table (Figure), enter the Total Capital ($) and Total Labor Workforce values.
NOTE: labor should be entered as the total population under 65 years of age at all structures at night (2AM). - At the bottom of the ECAM Data Importer (Figure), enter the Duration (Hours) of the flood, the Reconstruction (Hours), and the Cleanup (Hours) after the flood event. These estimates are used to calculate the labor reductions based on the number of work hours reduced due to and following the event.
- Click OK, the ECAM Data Importer dialog box (Figure) closes, and LifeSim imports the ECAM data.
NOTE: In LifeSim Version 2.0 to current Version (2026), users can view but cannot modify the entered duration, reconstruction, and cleanup hours after creating the ECAM dataset.
View ECAM Data
Users can view the ECAM dataset in the map window from the Map Layers tab. Created ECAM data can be copied or deleted, viewed, and/or displayed in the map window.
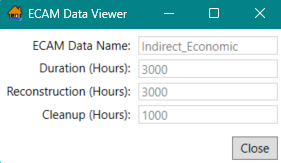
To view the duration, reconstruction, and cleanup hours for an ECAM dataset, from the LifeSim main window, from the Study tab, from the Study Tree, under ECAM Data, right-click an ECAM dataset (e.g., Indirect_Economic in Figure).
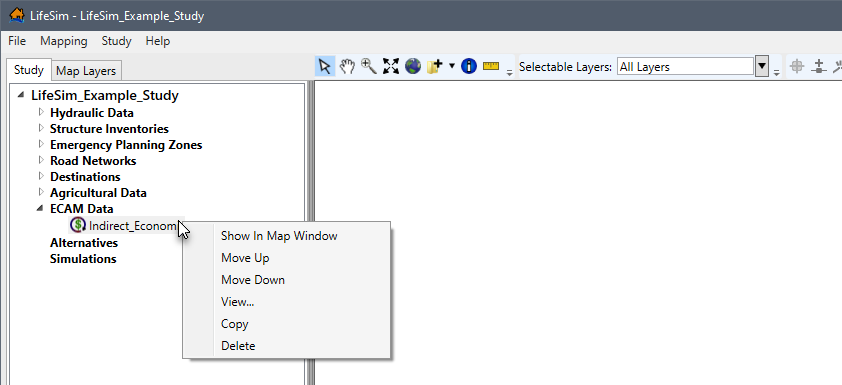
From the shortcut menu (Figure), click View. The ECAM Data Viewer (Figure) opens and displays the name, duration, reconstruction and cleanup information for the selected dataset. Click Close to close the ECAM Data Viewer.
Show in Map Window
To view the ECAM dataset in the map window, from the LifeSim main window, from the Study tab, from the Study Tree, from the ECAM Data folder, right-click on an ECAM dataset name. From the shortcut menu (Figure), click Show In Map Window. The selected ECAM dataset is added to the Map Layers tab and displays in the map window.
NOTE: from the Study tab, right-click the ECAM dataset and click Remove From Map Window from the shortcut menu to stop displaying the dataset. Alternatively, from the Map Layers tab, right-click the ECAM dataset and click Remove (Figure) from the shortcut menu.
View Attributes Table
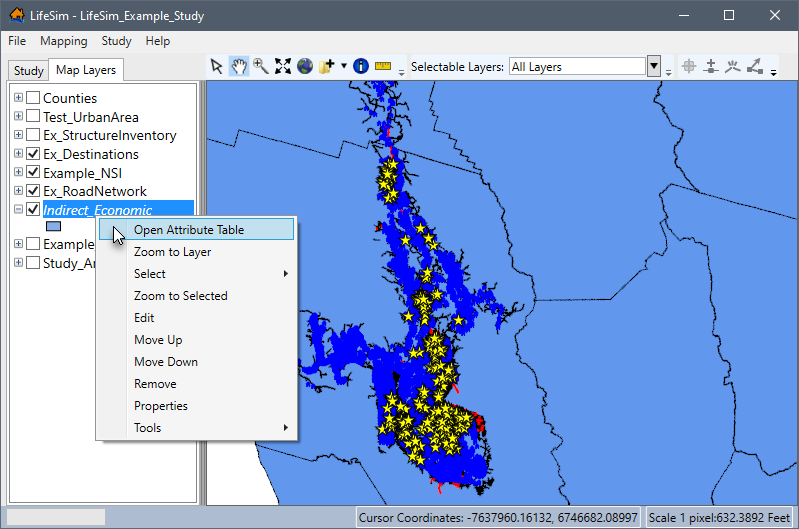
Map layer attributes can be accessed for each map layer and is provided in a table for the dataset referenced by the map layer. The ECAM dataset must be displayed in the map window before the attribute table can be accessed. To access a specific map layer's attribute table, from the Map Layers tab, right-click on a map layer of interest. From the shortcut menu, click Open Attribute Table (Figure). The Map Layer Attributes dialog box opens; review Section Map Layer Attributes Dialog Box for more information.
Edit Attributes Table
From the opened Attribute Table for the ECAM dataset, click the Start Feature
Edit Session  button to edit the total capital ($) and
total labor values by
county. Further information regarding editing the map layer attributes is provided in Section Editing Map Layer Features and
Attributes.
button to edit the total capital ($) and
total labor values by
county. Further information regarding editing the map layer attributes is provided in Section Editing Map Layer Features and
Attributes.
Copy an ECAM Dataset
To copy an ECAM dataset from an existing dataset, from the LifeSim main window, from the Study tab, from the Study Tree, under ECAM Data, right-click an ECAM dataset (e.g., Indirect_Economic in Figure). From the shortcut menu, click Copy. The Name of New Study Item dialog box (Figure) opens. Enter a new name in the Name box. Click OK, the Name of New Study Item dialog box (Figure) closes, and the copied ECAM dataset displays in the Study Tree.
Delete an ECAM Dataset
To delete a ECAM dataset from the LifeSim study and study directory files, from the LifeSim main window, from the Study tab, from the Study Tree, under ECAM Data, right-click an ECAM dataset (e.g., Indirect_Economic in Figure). From the shortcut menu, click Delete. A Confirm Delete message window (similar to Figure) opens asking for confirmation to delete the selected ECAM dataset. Click Yes, the Confirm Delete message window closes, and the selected ECAM dataset is deleted and no longer displays in the Study Tree.