Installing and Starting LifeSim
This chapter describes the recommended computer system requirements for installing and running LifeSim. The software includes a graphical user interface (GUI) designed to increase the usability and efficiency of the software. The LifeSim GUI provides for file management, data entry and editing, and viewing output results.
Requirements
- Installation: about 180MB (megabytes) of hard disk space
- Memory: 1GB (gigabytes) RAM (random access memory); recommended 4GB RAM
- Operating System: Microsoft Windows XP, Windows 7, Windows 8/8.1/Windows 10, Windows 11
- Microsoft .NET Framework Version 4.0
Installation
🡇 LifeSim v2.1.6aLifeSim Version 2.1.6a is available for download as a self-extracting setup package.
The installer (with administrative privileges) will run through selecting an install location (e.g., C:\Program Files).
Starting LifeSim
To start LifeSim, navigate to the install directory location chosen in the aforementioned section. The software will be within a Compressed Archive Folder (*.7z).
Select Extract All in File Explorer. Navigate to the extracted folder and double-click the  LifeSim.exe.
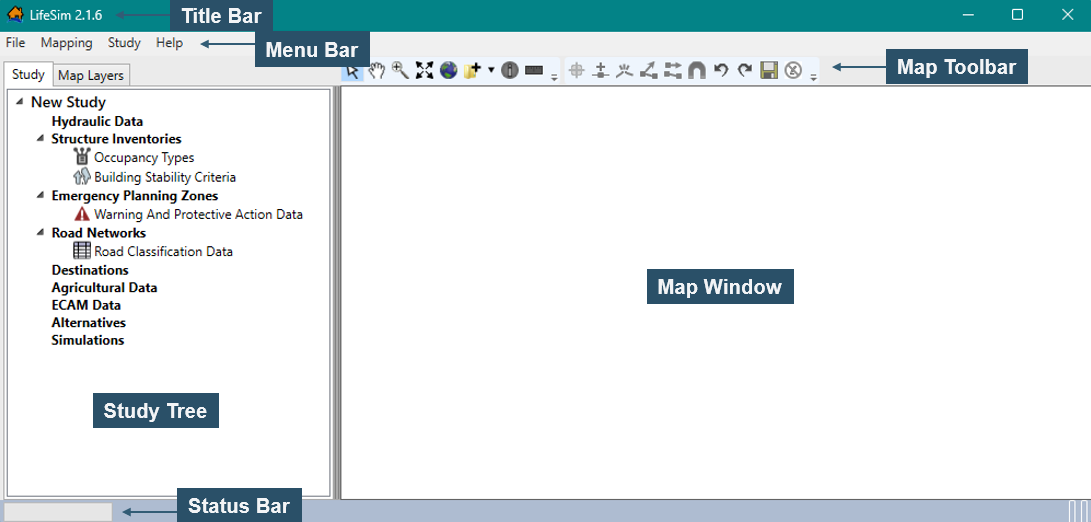
The main window of LifeSim will appear (Figure), and you are ready to begin.
LifeSim.exe.
The main window of LifeSim will appear (Figure), and you are ready to begin.
Users may Pin to Start, Pin to Taskbar, or Create Desktop Shortcut for easy access to the LifeSim software.
Creating a Study
A study in LifeSim is a combination of the data, models, or events required to analyze a specific geographical area. The study represents all the input data and simulation output required to adequately answer the question of estimating consequences from a hazard.
There are two ways to create a study.
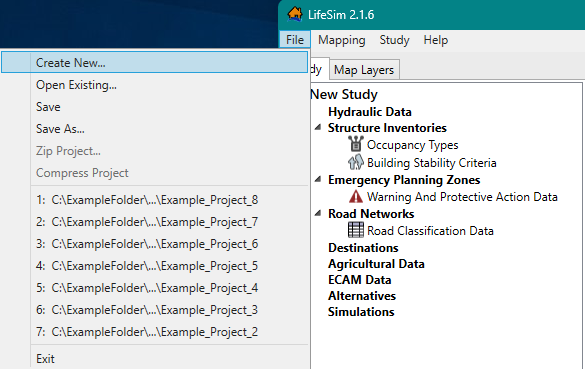
Option 1: From the File Menu (Figure)
From the main window, select File in the Menu Bar (Figure), and select Create New.
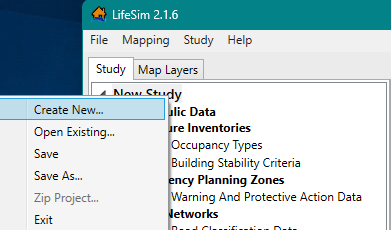
Option 2: From the Study Tree (Figure)
In the Study Tree (Figure), right-click New Study and select Create New.
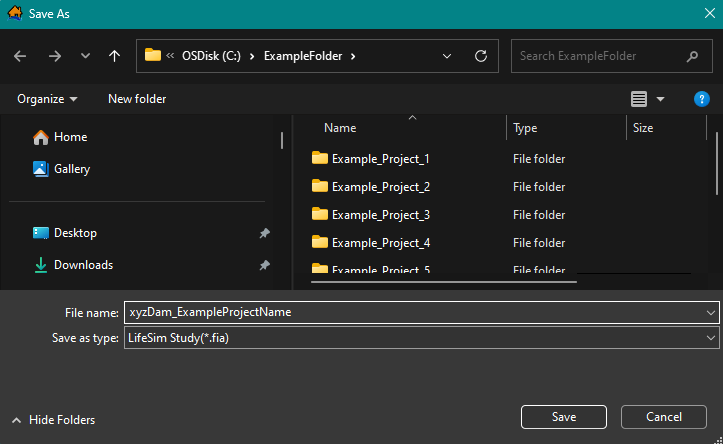
Either way, the Save As browser will open (Figure). From the Save As browser, navigate to the location (directory) where the LifeSim study will be created. Enter a project name (required) in the File name box.
Example: ProjectName_LifeSimVersion_YYYY (e.g., xyzDam_RiskAssessment_LifeSim216a_2026) where,
- Date format is YYYY, the year of the project creation.
- LifeSimVersion is the version of LifeSim used to create or update the project (e.g., LifeSim216a for LifeSim Version 2.1.6a).
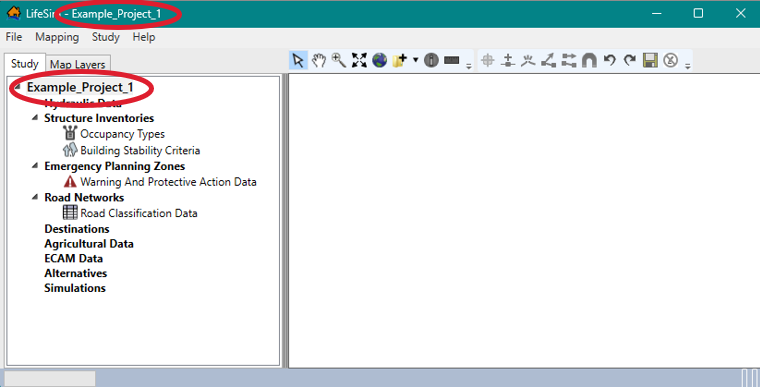
Click Save, and the Save As browser will close. The LifeSim main window will now have the name of the study in the Study Tree and the Title Bar (Figure).
A directory with the study name and associated files will be created for the study.
Study Directories and Files
Directories and files are automatically created by LifeSim to store information. As data is entered, subsequent files and subdirectories are created. A description of the created directories is provided below:
 LifeSim Example Study
Study folder that is created when a user creates a new study.
Sub-Directories
Agricultural_Data
Sub-directory created by LifeSim when agriculture data is imported. Contains the created agriculture data geotiff.
Hydraulic_Data
Sub-directory created by LifeSim when hydraulic data is imported. Contains files that define data items for imported hydraulic data. Also, sub-directories are created when hydraulic data is defined and are dependent on the hydraulic data import option utilized.
 *.fia
*.fia
File created by LifeSim when a study is created. Contains the name and description of the study, map properties, and references to the LifeSim study elements. The *.fia file also holds the following study data:
- Structure Inventory: Contains all of the information about the imported and defined structure inventory, damage categories and structure occupancy types.
- Emergency Planning Zones (EPZ) Data: Contains all of the information about the imported and defined EPZ data.
- Road Network: Contains all of the information about the imported and defined road network.
- Destination Data: Contains the created destination data.
- Alternative Data: The created alternative is saved as an XML file.
- Simulations: Contains all of the created and computed simulation data.
Opening an Existing Study
It is important to note that at this time, LifeSim Version 2.1.6a cannot open or update LifeSim Version 1.0 studies.
To open an existing LifeSim study:
From the LifeSim main window (Figure), click File in the Menu Bar, and select Open Existing. The File Explorer will automatically open. Navigate to your project directory location and click the LifeSim study file (*.fia) (Figure). The File name box will now contain the filename (e.g., Example_Project_1.fia).
Another way is from the Study Tree (Figure), right-click New Study, select Open Existing, and follow the same preceding steps.
Select Open in the File Explorer.
As shown in Figure, LifeSim now displays the selected study in the Study Tree, and the study name will display in the Title Bar (Figure).