
Getting Started
Prerequisites
Before you begin, install the following programs:
- Visual Studio Code (VS Code) or your preferred Individual Development Environment (IDE)
- Node.js (version 18.0 or later)
- Git and/or GitHub Desktop
These instructions are for U.S. Government (USG) computers and assume VS Code as the IDE.
✅ Installing VS Code
Visual Studio Code is a lightweight code editor used to write, edit, and manage software and documentation projects. It is the recommended IDE for working on the RMC Software Documentation site.
VS Code is available for request through the USACE App Portal. It does not require approval, and installation should occur automatically. If installation doesn’t begin in the next 48 hours, contact the Enterprise Service Desk at (866) 562-2348.
Several users have reported issues with VS Code installing correctly onto their USG computers from the App Portal and have required assistance from CIO-G6.
For improved visual clarity and syntax highlighting when editing .mdx files in VS Code, install the MDX extension from the Visual Studio Code Marketplace.
✅ Installing Node.js
Node.js is a JavaScript runtime that uses an asynchronous, event-driven architecture to support the development of scalable web applications. The Docusaurus framework used to build the RMC Software Documentation website relies on tools that run on Node.js.
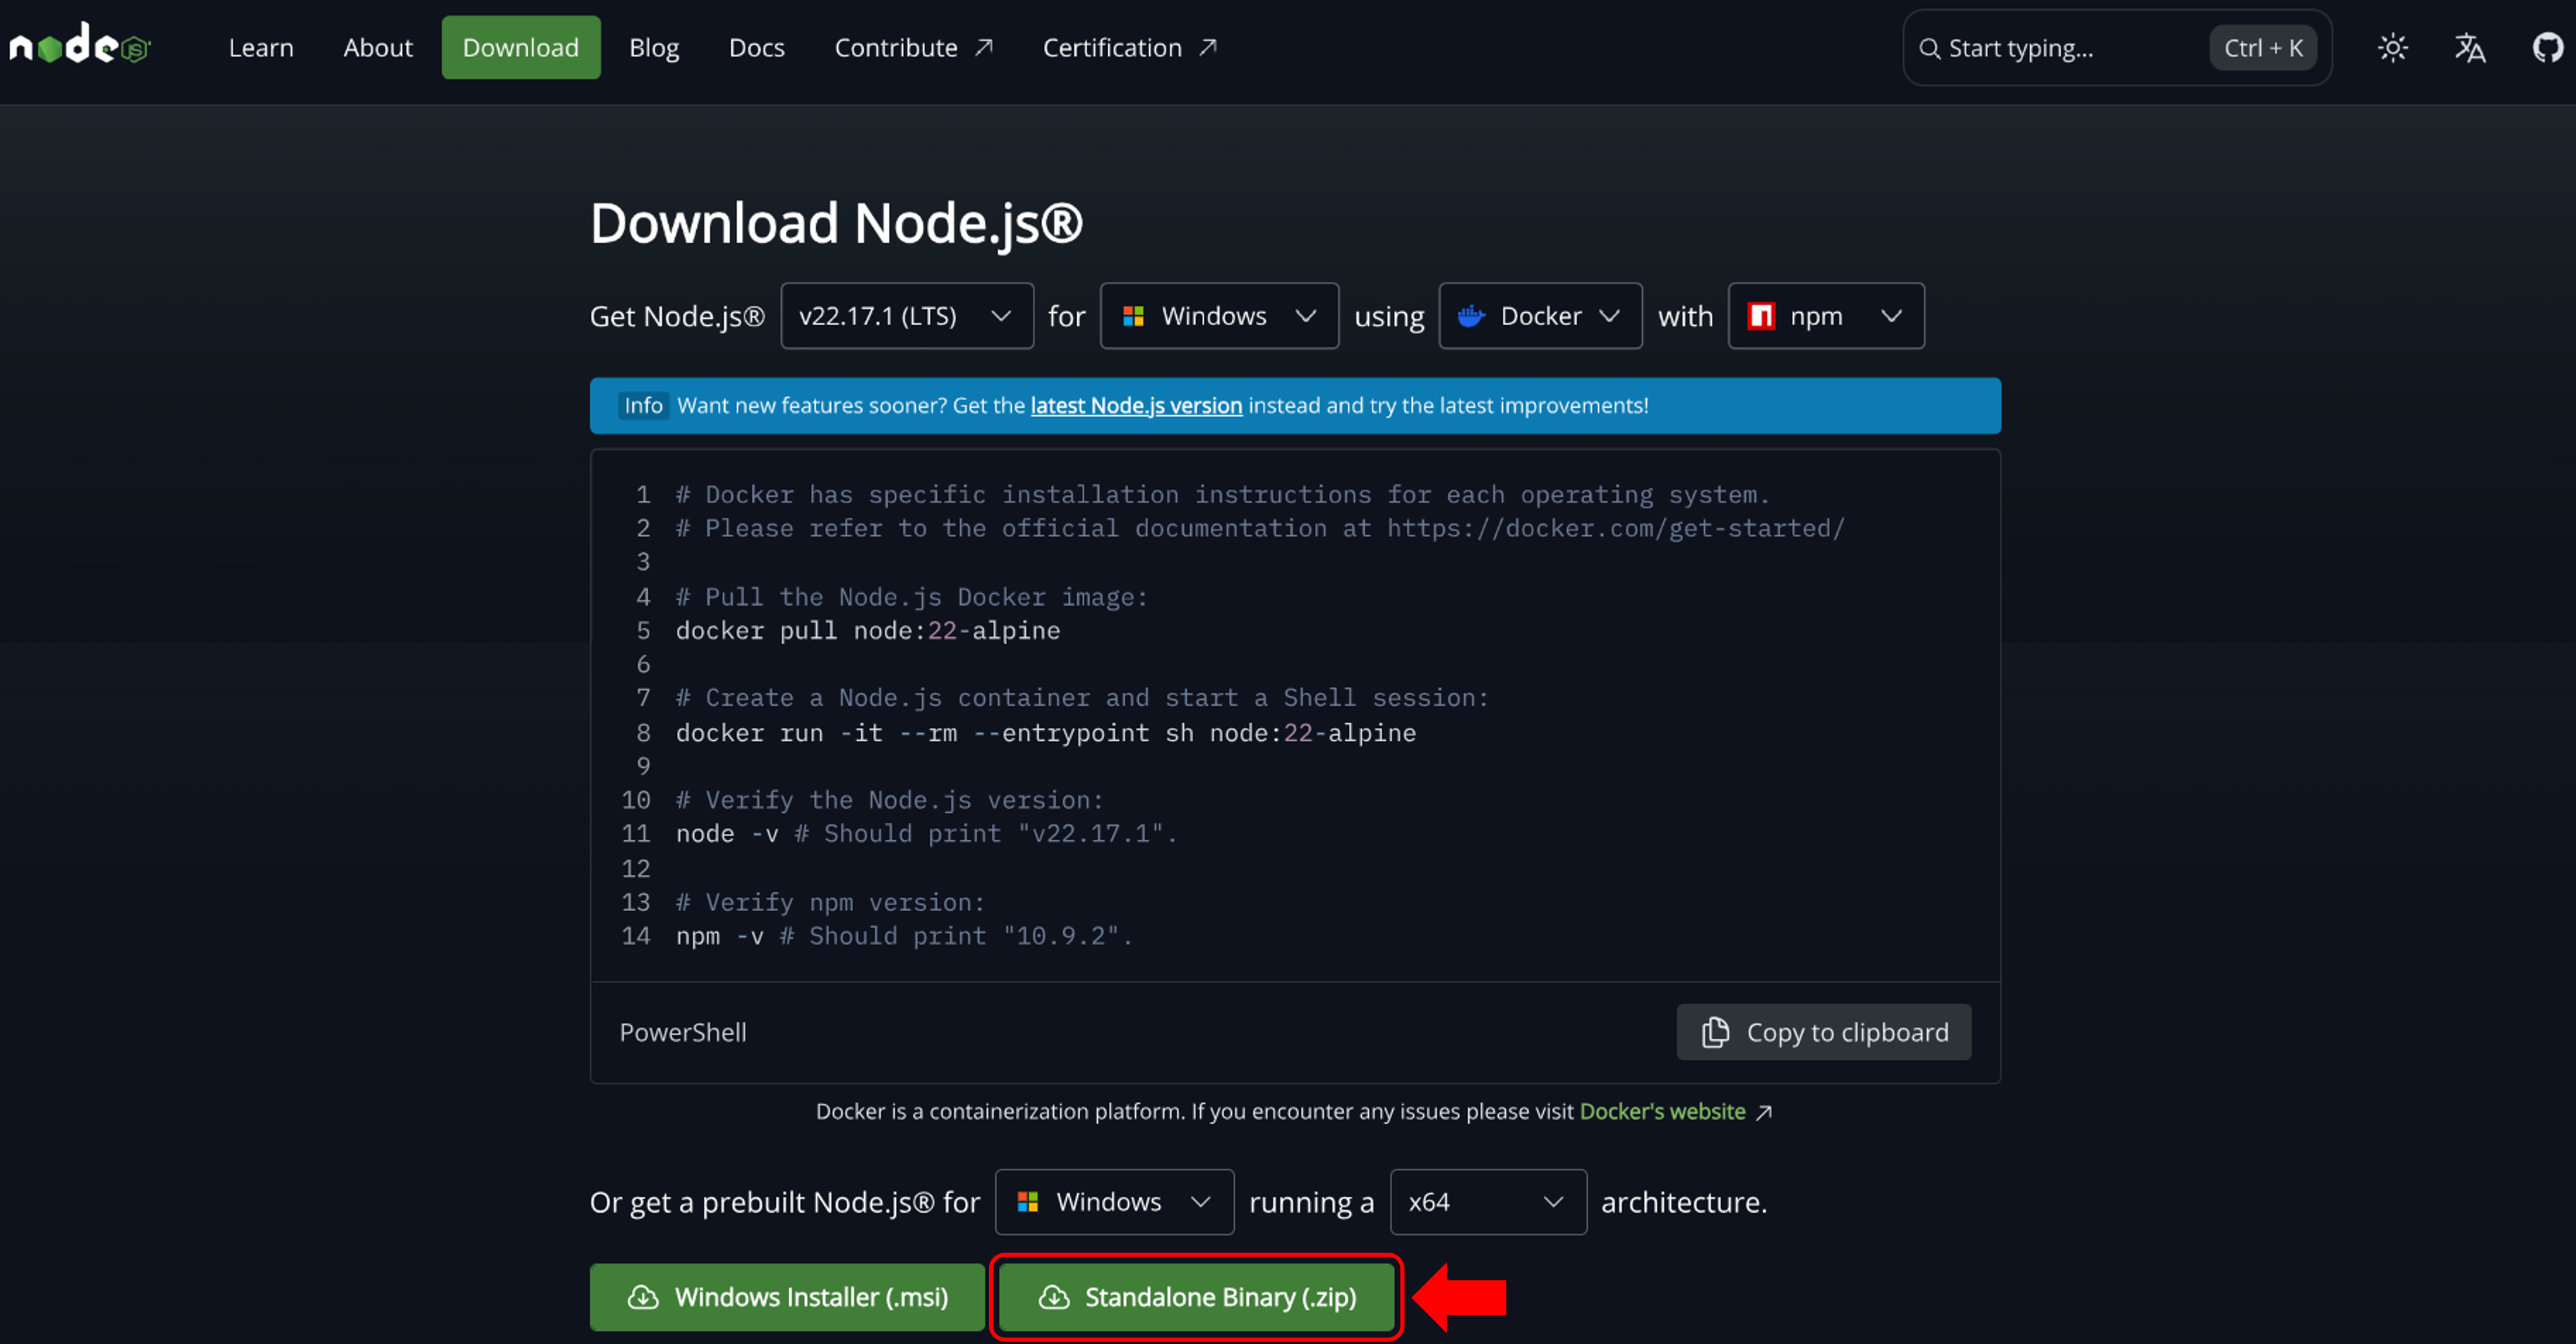
While Node.js is available through the USACE App Portal, it is recommended to download it directly from the official Node.js website.
To install Node.js:
- On a non-USG computer, download the Standalone Binary (.zip) installation file from the Node.js Downloads page. It is recommended to download the LTS (Long-Term Support) version of the software.
-
On your USG computer, create a folder on the
C:drive namedPortable Software(or similar). Place the Node.js zip file in that folder and extract the contents. -
Add Node.js to your PATH:
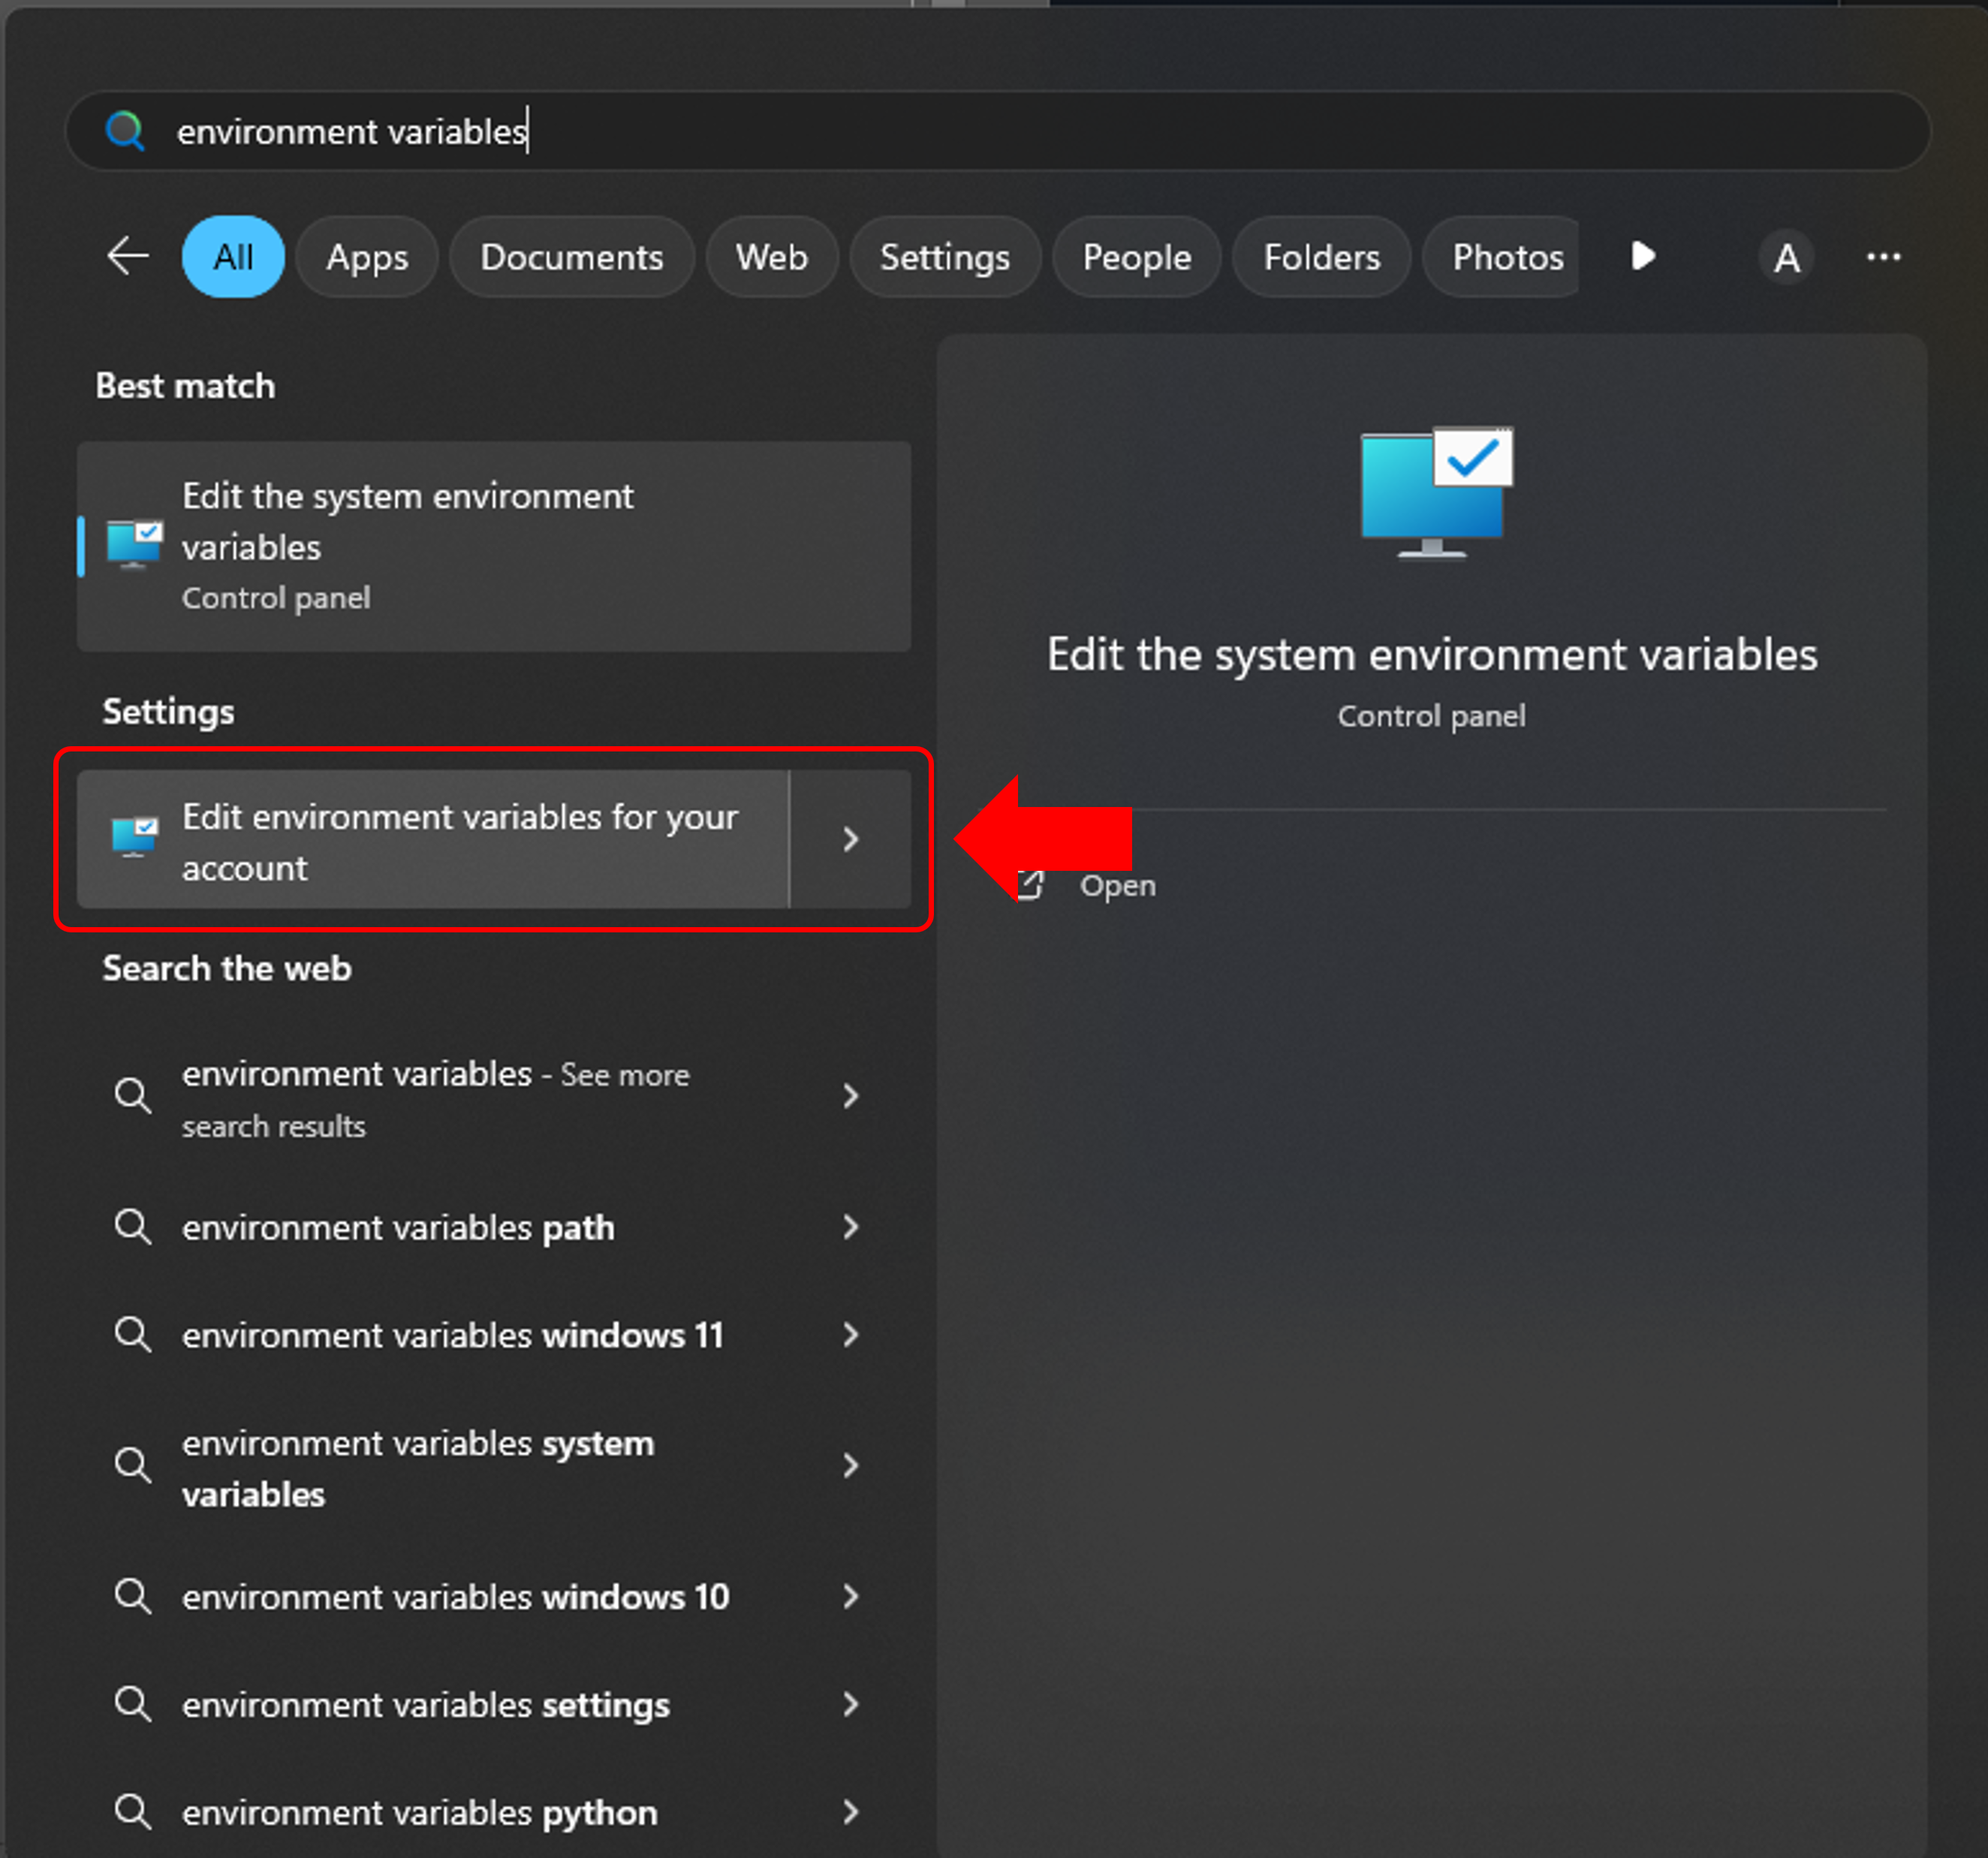
- Open the Windows menu and type environment variables into the Search Bar
- Click on Edit environment variables for your account
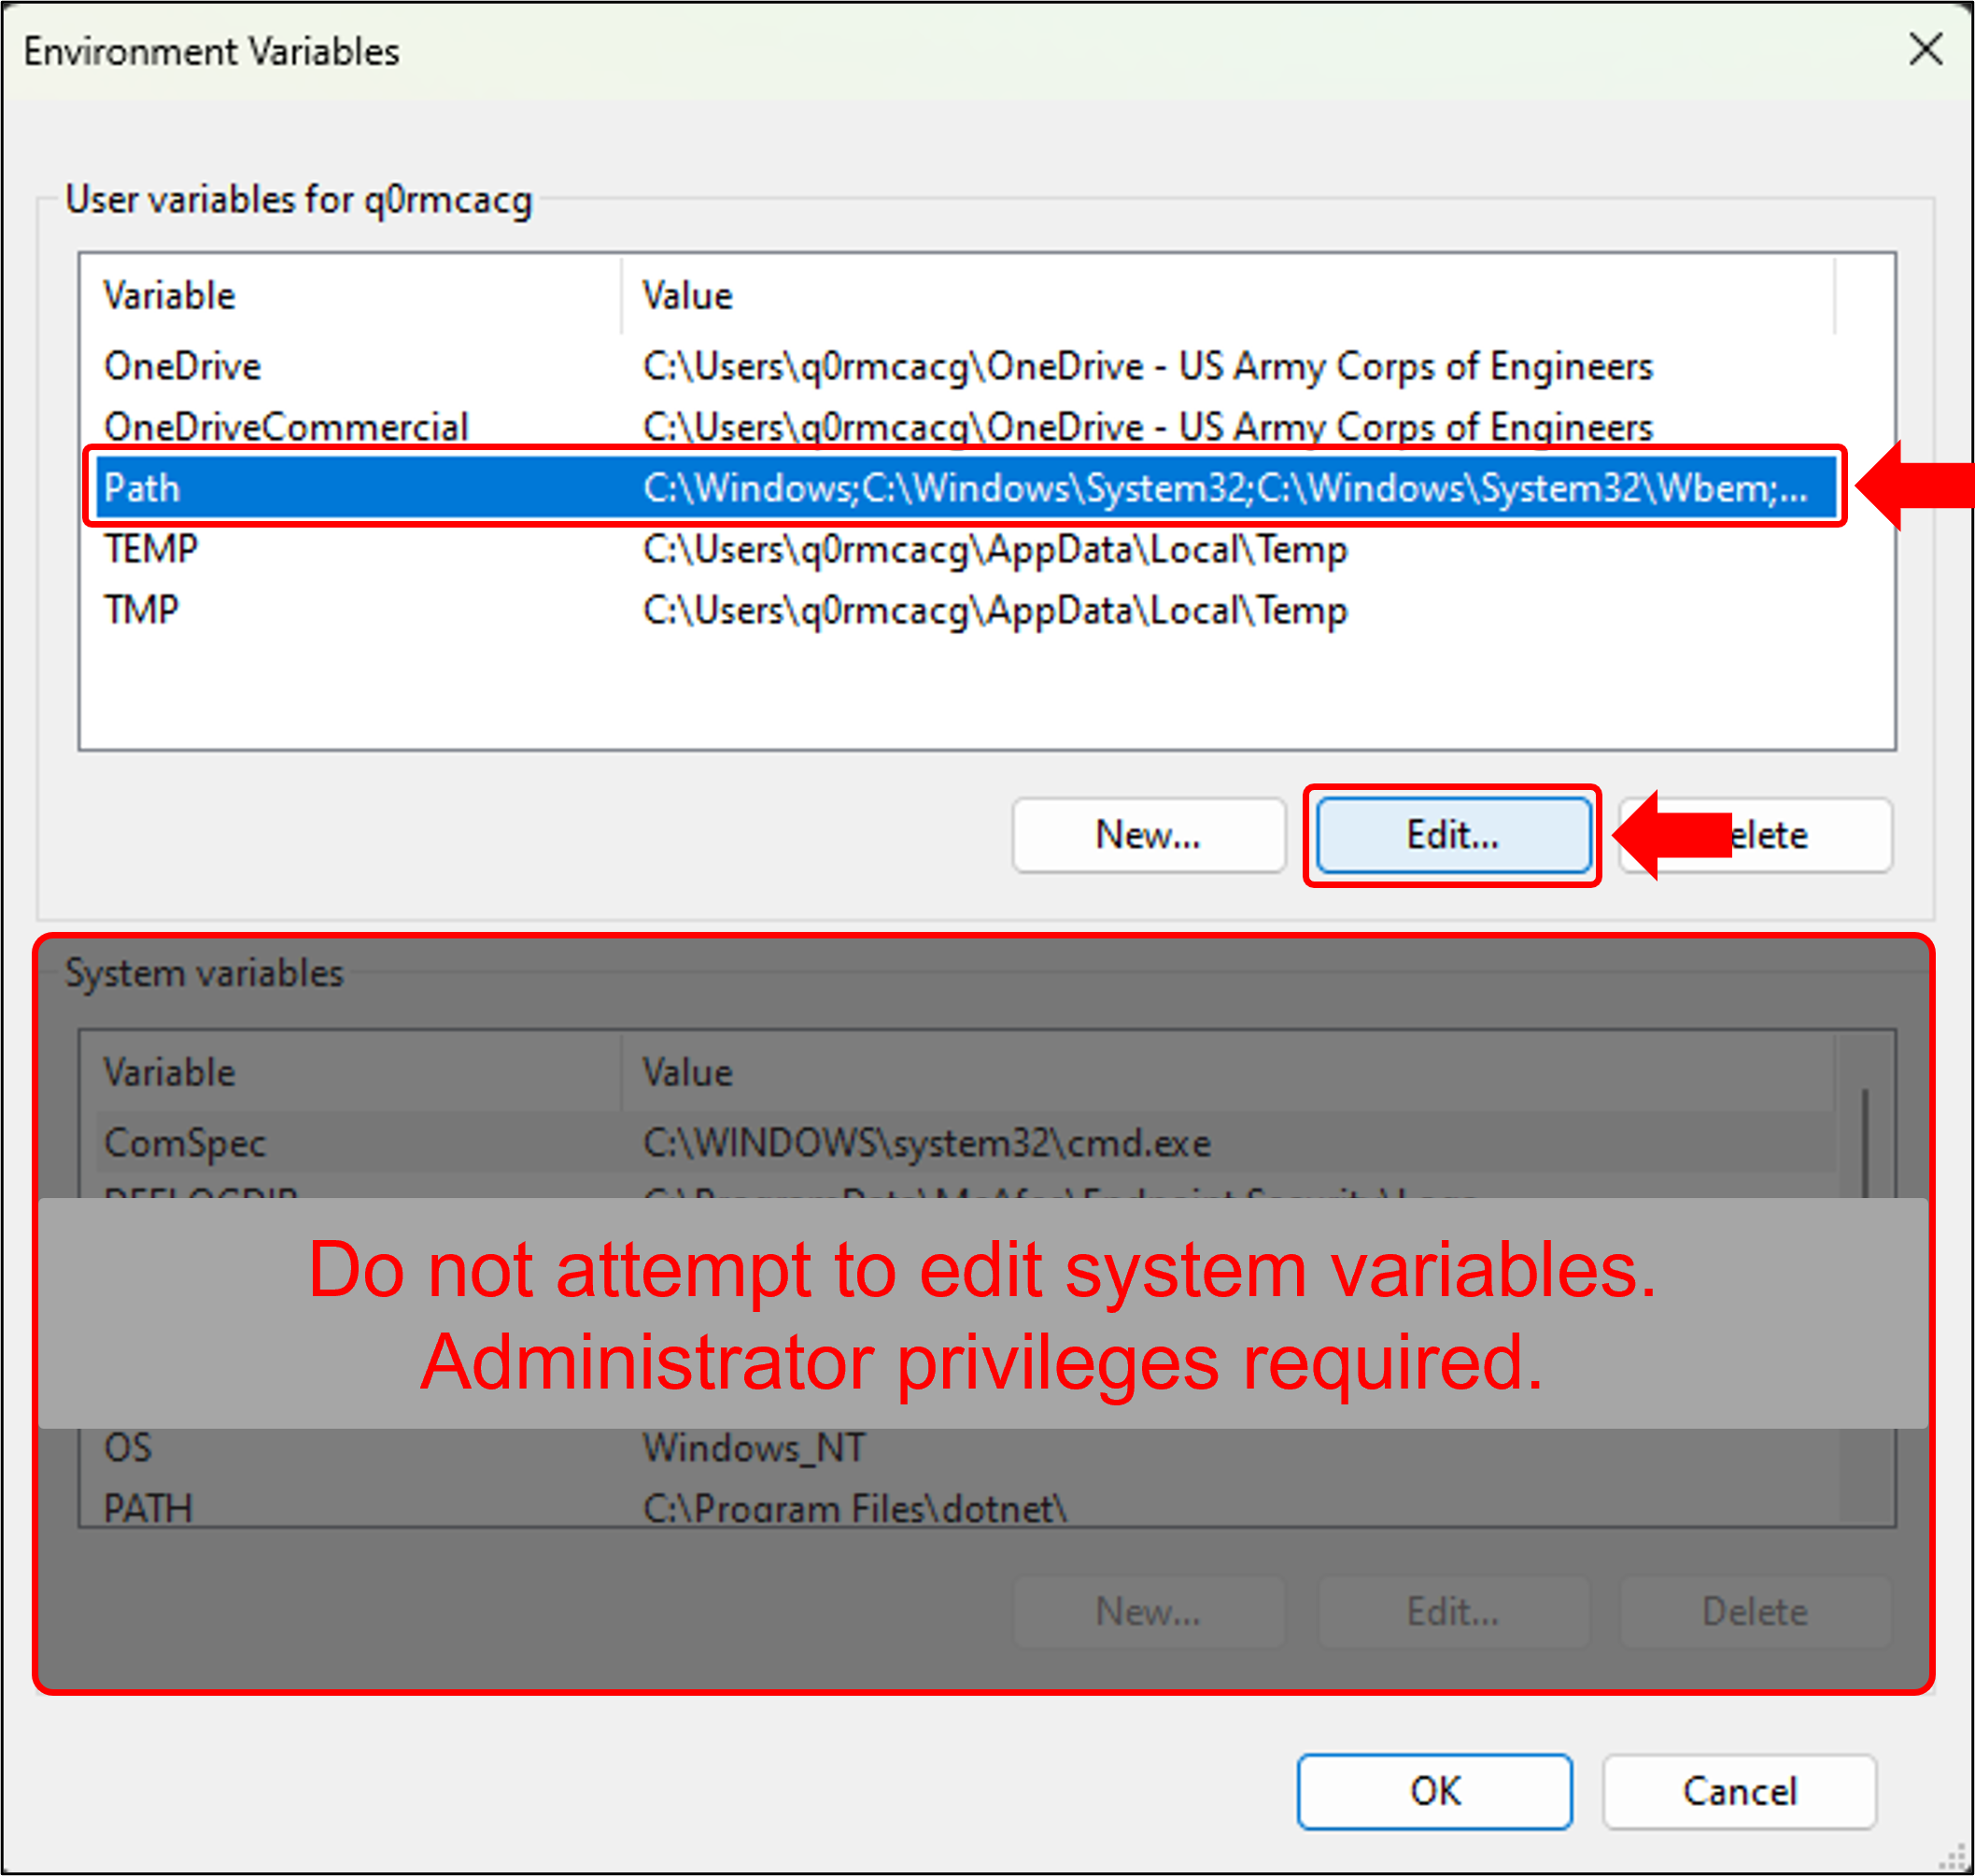
❌ DO NOT click on Edit the system environment variables — that requires admin rights
- In the Environment Variables window, select "Path" and click Edit...
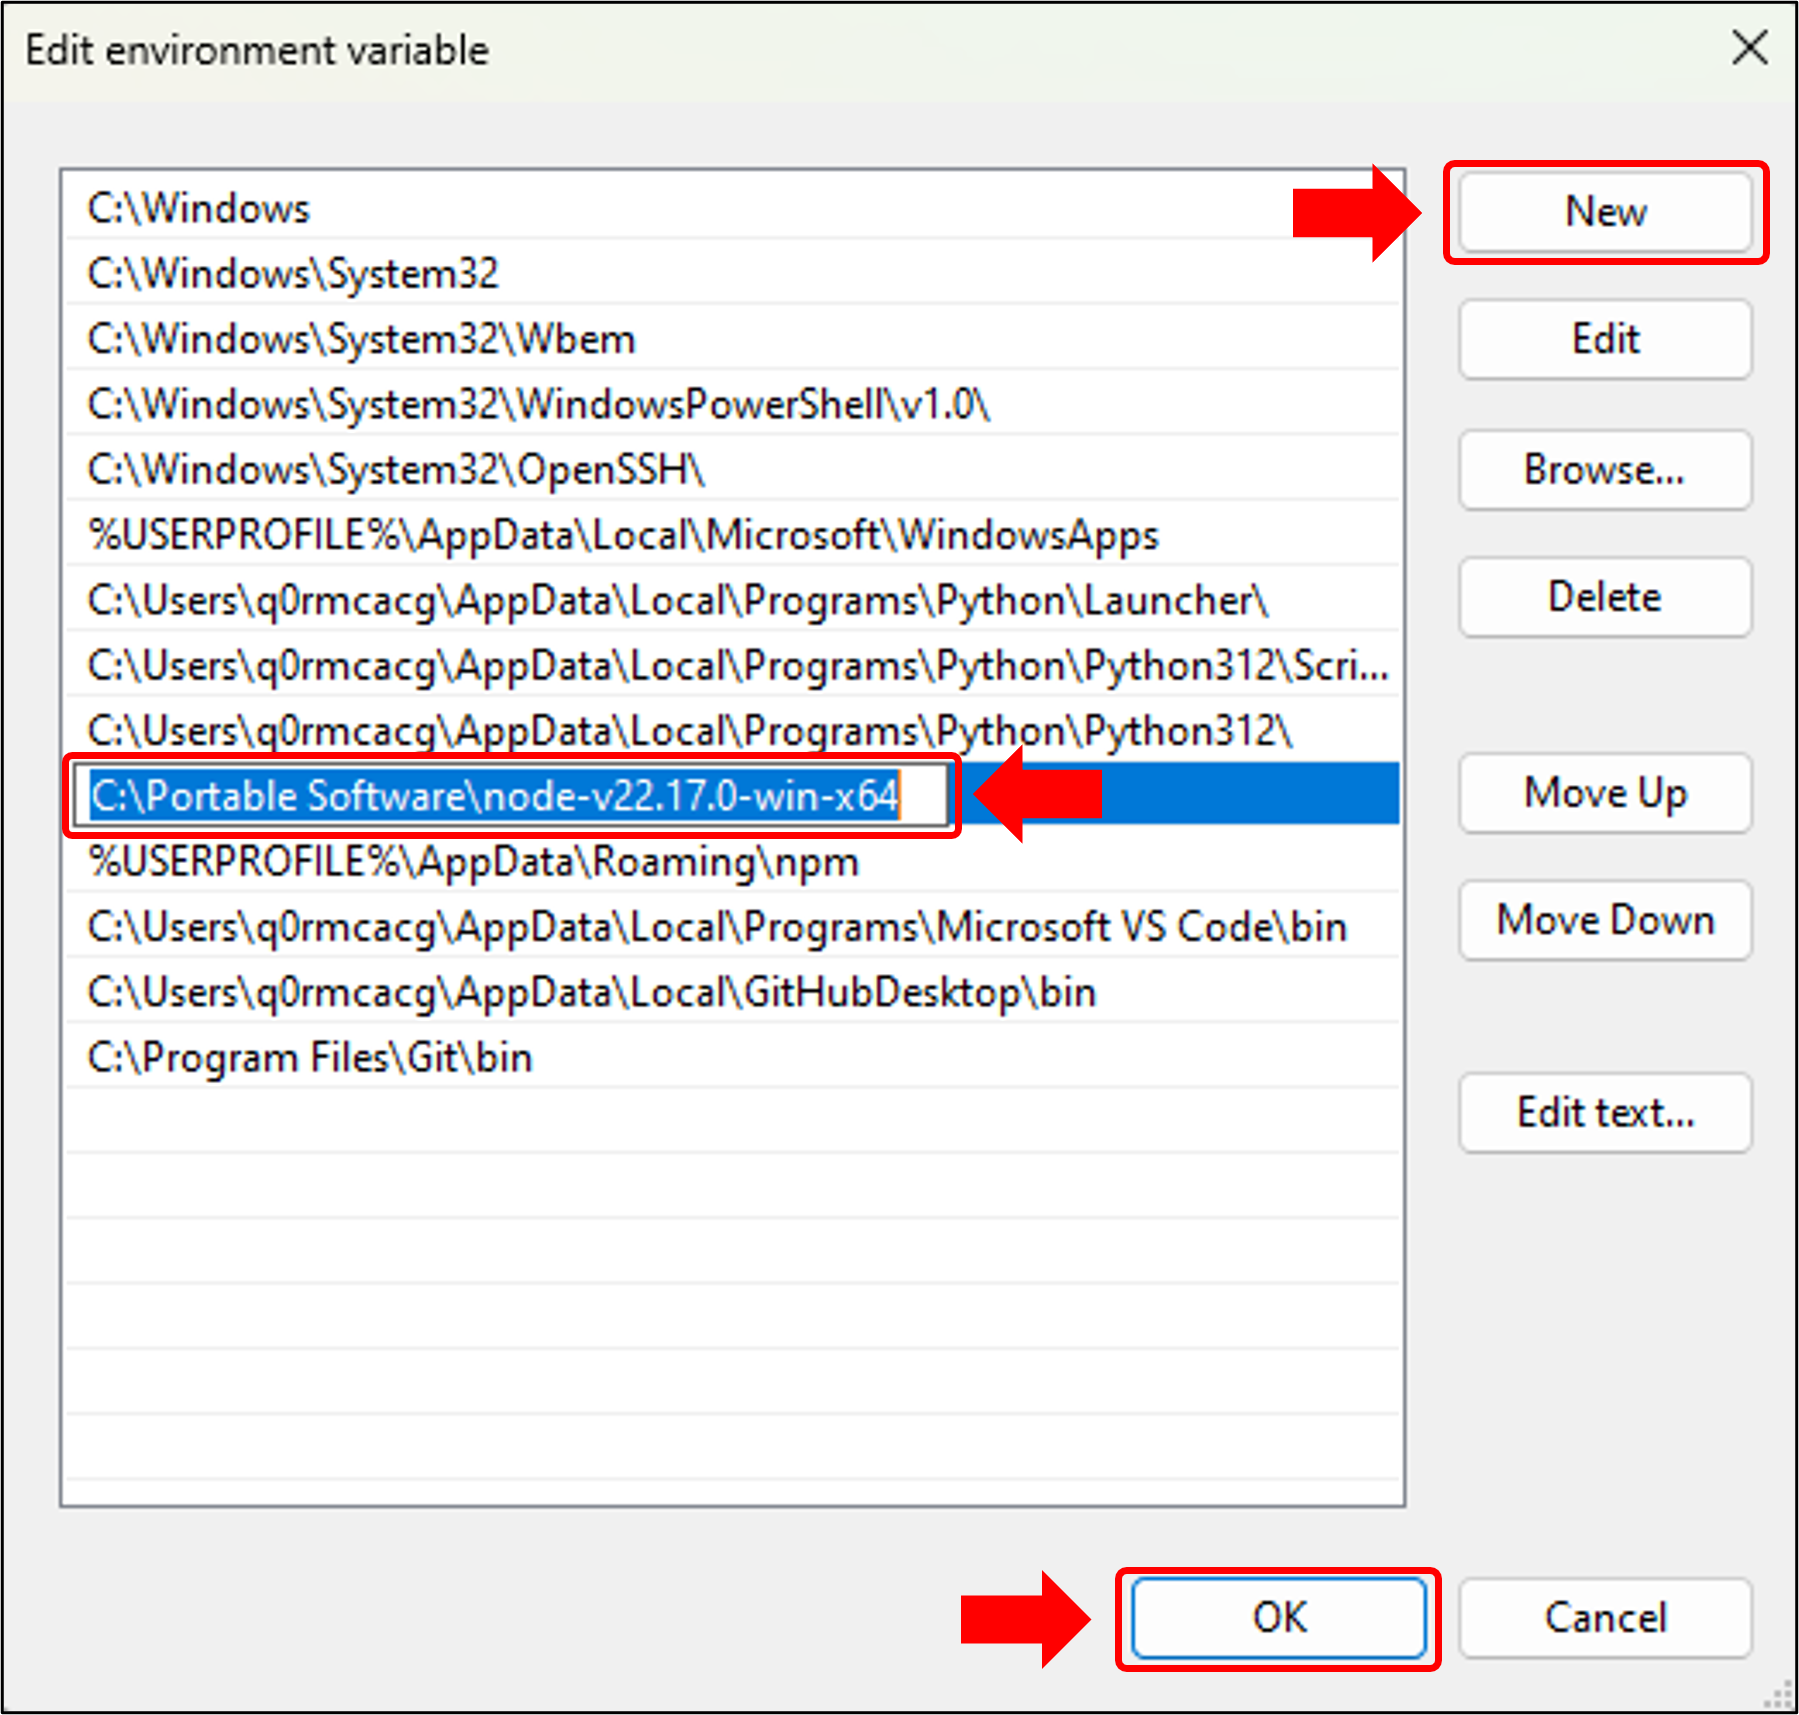
- Click New and paste the file path for your Node.js folder (e.g.,
C:\Portable Software\nodejs). This should be the folder that holds the node.exe file. - Click OK to close the environment variable windows
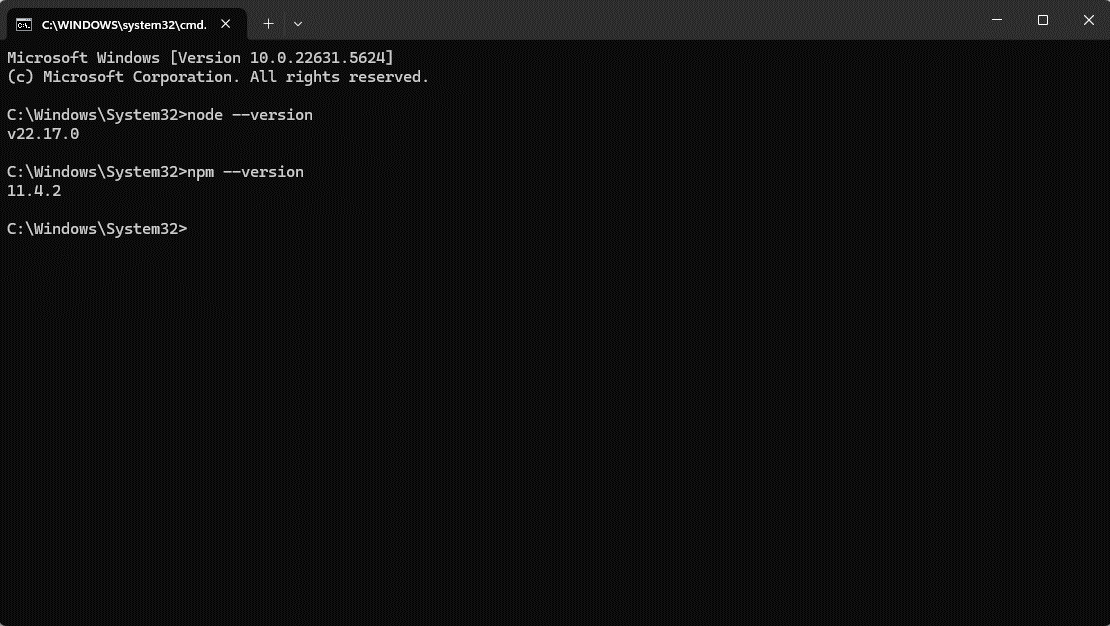
- Confirm installation of Node.js and Node Package Manager (npm):
- Open Command Prompt and type
node --version- If installed correctly, the terminal will return the Node.js version number (e.g.,
v18.20.0or later).
- If installed correctly, the terminal will return the Node.js version number (e.g.,
- Then type
npm --version- npm is bundled with Node.js and does not require a separate installation. It should return a version number (e.g.,
10.5.0or later).
- npm is bundled with Node.js and does not require a separate installation. It should return a version number (e.g.,
- NOTE: The Node.js and npm version numbers will not be the same. This project requires Node.js version 18.0 or later.
- Open Command Prompt and type
- If either version command fails, ensure that the path to your Node.js folder is correctly entered in the Environment Variables. Repeat steps 3–4 if necessary.
✅ Installing Git and GitHub Desktop
Git is a version control system that tracks changes to files over time. It allows you to commit updates, create branches, and synchronize code with shared repositories. GitHub Desktop provides a graphical interface for Git, making it easier to use for contributors who prefer not to work from the command line.
These tools are required to:
- Download (clone) the RMC Software Documentation repository from GitHub
- Make updates locally on your machine
- Push changes back to GitHub for review and publication
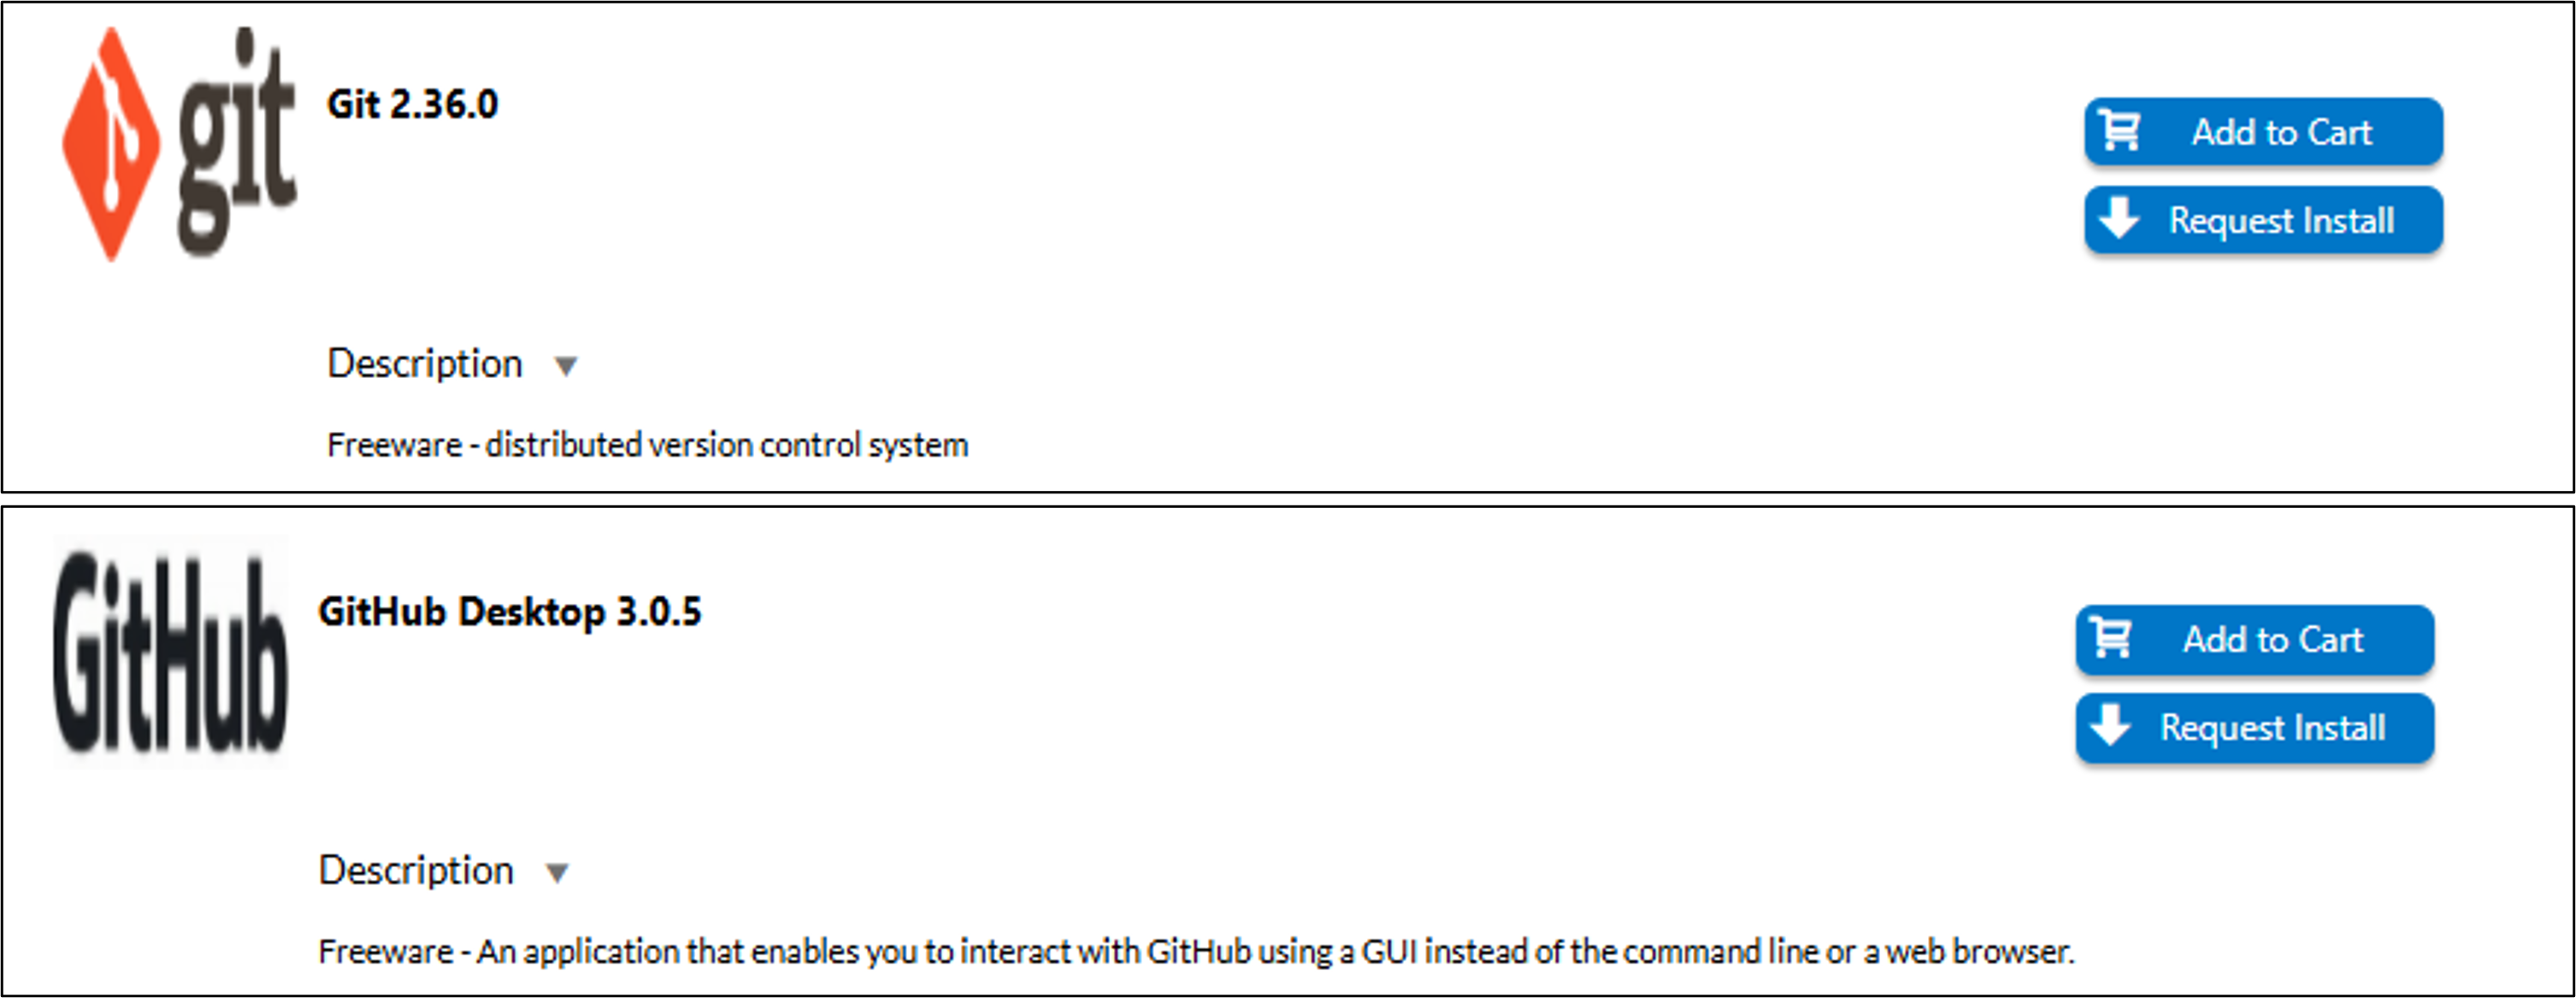
Git and GitHub Desktop are both available for installation from the USACE App Portal.
To install Git and GitHub Desktop:
1. Request installation from the App Portal
- Open the USACE App Portal
- Search for and request the following applications:
GitGitHub Desktop
- Installation should occur automatically. If installation doesn’t begin in the next 48 hours, contact the Enterprise Service Desk at (866) 562-2348.
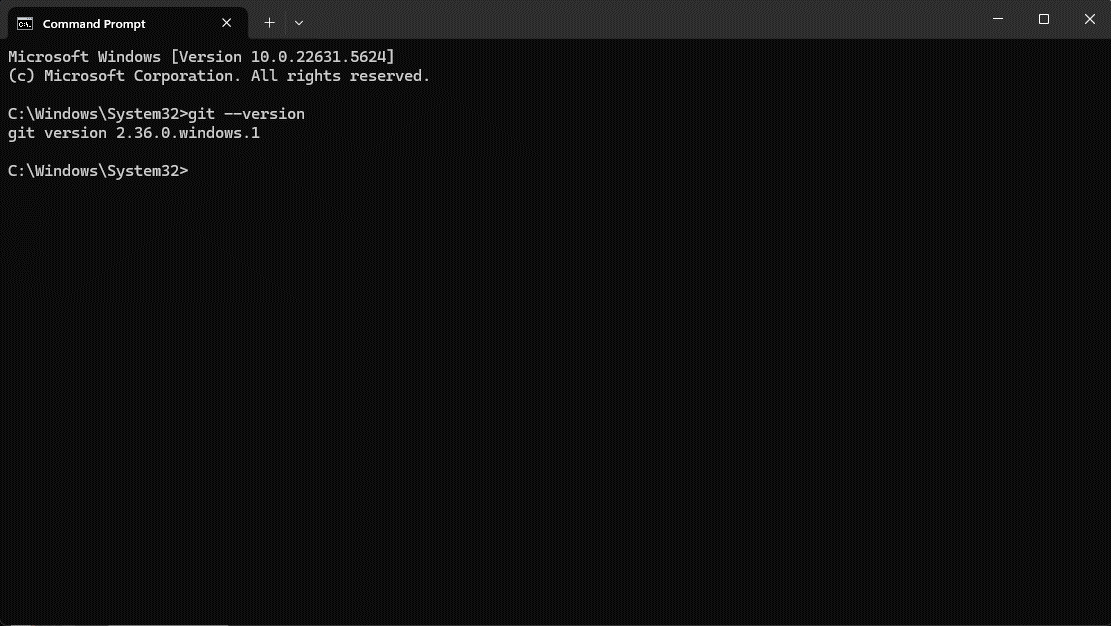
2. Verify installation
- Open Command Prompt and type
git --version- If installed correctly, the terminal will return the Git version number (e.g.,
git version 2.42.0.windows.2).
- If installed correctly, the terminal will return the Git version number (e.g.,
- To confirm GitHub Desktop is installed, open the Windows Start Menu and search for GitHub Desktop. The application should appear in the list.
GitHub Desktop can be used to clone, commit, push, and pull changes to and from the repository without using Git commands directly. However, Git is still required under the hood, even when using GitHub Desktop.
GitHub Account and Repository Access
Before you can clone and contribute to the RMC Software Documentation repository, you need to have a GitHub account and appropriate access permissions.
✅ Creating a GitHub Account
If you don't already have a GitHub account:
- Visit github.com and click Sign up
- Follow the prompts to create your account using your USACE email address
- Complete email verification
- Consider enabling two-factor authentication (2FA) for security
✅ Requesting Collaborator Access
The RMC Software Documentation repository is public, which means anyone can view and clone it. However, to push changes directly to the repository, you must be added as a collaborator.
To request collaborator access:
- Contact the repository administrator, Adam Gohs
- Provide your GitHub username
- Wait for the invitation email from GitHub
- Accept the collaboration invitation
Once added as a collaborator, you'll be able to:
- Clone the repository to your local machine
- Create and switch between branches
- Commit and push changes directly to the repository
- Participate in code reviews and pull requests
If you are an external contributor or prefer not to request collaborator access, you can:
- Fork the repository to your own GitHub account
- Clone your forked repository
- Make changes in your fork
- Submit a pull request back to the main
USACE-RMC/RMC-Software-Documentationrepository
This workflow is common for open-source projects but requires additional steps. For internal RMC team members, collaborator access is recommended.
Cloning the Project
To begin working on the RMC Software Documentation website, you'll first need to clone the project repository to your local machine and install the required dependencies.
It is recommended to store cloned Git repositories in a dedicated folder on your local machine, such as C:\GitHub or C:\Projects. This helps with organization when working with multiple repositories.
⚠️ Avoid OneDrive-synced locations for Git repositories. Cloning to a OneDrive folder can cause:
- Sync conflicts: OneDrive may try to sync files while Git is modifying them, potentially causing corruption
- Performance issues: Development tools and file watchers can be slowed by continuous OneDrive syncing
- Lock conflicts: OneDrive might lock files that Git or your IDE needs to access
- Large folder sync problems: Projects often contain thousands of small files (e.g.,
node_modules/,.git/) that can overwhelm OneDrive
Choose a location on your local drive (e.g., C:\GitHub) that is not synced to OneDrive, SharePoint, or other cloud storage services.
- Using GitHub Desktop
- Using Git (Command Line)
✅ Clone the Repository
- Open GitHub Desktop
- Go to File → Clone Repository
- In the Search Bar of the Clone a repository window, enter
RMC-Software-Documentationand select the repository under the USACE-RMC GitHub account. - Choose a Local path to save the repository.
- Click Clone.

✅ Open the Project Directory
- In GitHub Desktop, go to the Current Repository dropdown and select
RMC-Software-Documentation - Click Repository → Open in Visual Studio Code (or your configured IDE)
✅ Install Dependencies
Once the project is open in your IDE, open a terminal and run:
npm installThis will install all necessary dependencies to edit, test, build, and deploy the Docusaurus project. This includes folders such as .docusaurus/ and node_modules that are not tracked in GitHub.
warning
Node.js MUST be installed before running npm install or other Node.js-based commands. If not installed, an error will be returned.
✅ Clone the Repository
Open Command Prompt or PowerShell and run the following command:
git clone https://github.com/USACE-RMC/RMC-Software-Documentation.gitIf you've forked the repository to your own GitHub account, replace USACE-RMC with your GitHub username.
✅ Change into the Project Directory
Navigate to the cloned folder:
cd RMC-Software-DocumentationOpen the project in VS Code by running:
code .✅ Install Dependencies
Install the required packages by running:
npm installThis will install all necessary dependencies to edit, test, build, and deploy the Docusaurus project. This includes folders such as .docusaurus/ and node_modules that are not tracked in GitHub.
warning
Node.js MUST be installed before running npm install or other Node.js-based commands. If not installed, an error will be returned.
Running the Site Locally
💻 Starting the Development Server
To preview the RMC Software Documentation site on your local machine during development, run:
npm start
This will start the development server at http://localhost:3000. Any changes you make to the source files will automatically reload the site in your browser.
What happens when you run npm start:
- Automated scripts generate sidebars, counters, and version information
- Docusaurus compiles your MDX files
- A local web server starts on port 3000
- Your browser opens automatically to view the site
- Changes to files are detected and the site reloads automatically
While the development server is running:
- Edit
.mdxfiles and see changes instantly - Add images, tables, and components
- Test navigation and links
- Preview your documentation before committing
To stop the development server:
- Press
Ctrl+Cin the terminal
Contributors should focus on creating and editing documentation content using npm start for local testing. Site administrators will handle all building and deployment to production. See Appendix B: Build Process Overview for deployment details.
Troubleshooting Common Installation Issues
Node.js Not Recognized
Problem: Running node --version returns "command not found" or similar error.
Solutions:
- Verify that Node.js is installed in the correct location (e.g.,
C:\Portable Software\nodejs) - Check that the Node.js folder path is correctly added to your PATH environment variable
- Restart Command Prompt after adding to PATH (changes don't take effect in open terminals)
npm install Fails
Problem: Running npm install produces errors or fails to complete.
Solutions:
- Ensure Node.js version is 18.0 or later (
node --version) - Delete the
node_modulesfolder andpackage-lock.jsonfile, then trynpm installagain - Check your internet connection (npm needs to download packages)
- Clear npm cache:
npm cache clean --force, then try again
Dev Server Won't Start
Problem: Running npm start produces errors or doesn't launch the development server.
Solutions:
- Ensure you've run
npm installsuccessfully first - Check that port 3000 isn't already in use by another application
- Clear the Docusaurus cache:
npm run clear, then trynpm startagain - Delete the
.docusaurusfolder manually, then try again - Review error messages carefully - they often indicate missing dependencies or configuration issues
VS Code Installation Issues
Problem: VS Code doesn't install automatically from USACE App Portal.
Solutions:
- Wait 48 hours after requesting from the App Portal
- Check the Software Center application for installation status
- Contact Enterprise Service Desk at (866) 562-2348
- As noted in the installation section, several users have required CIO-G6 assistance for VS Code installation
If you encounter issues not covered here, see the Troubleshooting & FAQ section for more detailed guidance.